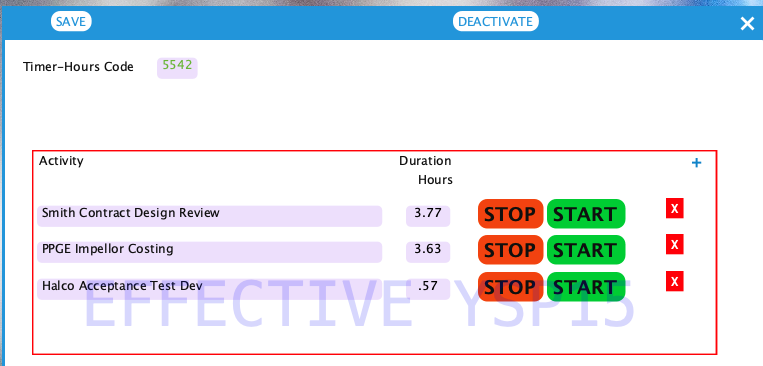
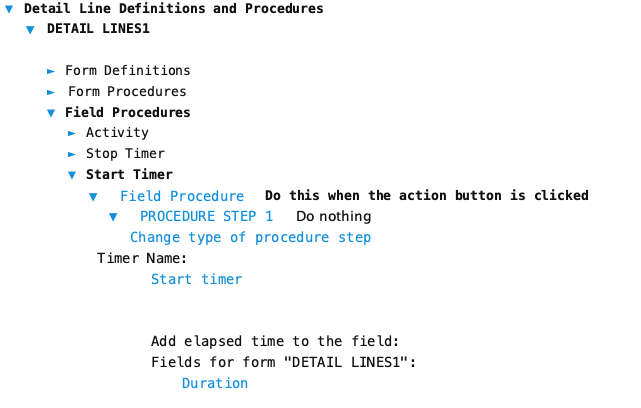
Action field (button) to start the timer using ‘Start or Stop a Timer’ procedure step type
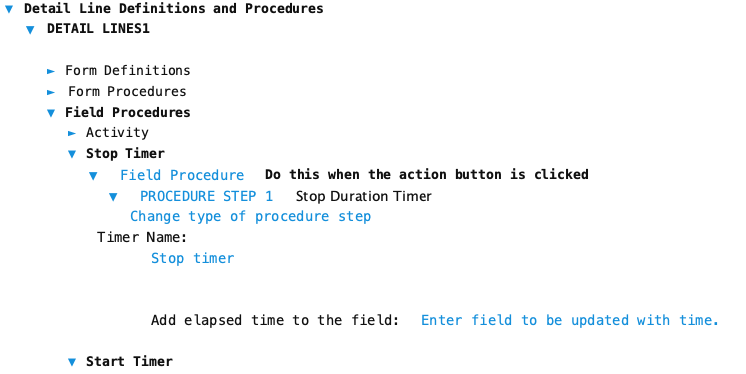
Action field (button) to stop the timer using ‘Start or Stop a Timer’ procedure step type
The Duration field is configured to show desired units – in the example above seconds are used. Typically you want minutes or even hours. Since it is a quantity field you can show the elapsed time in whatever time unit you want. If you include digits after the decimal point then fractional units are in decimal form, not minutes or seconds. The displayed elapsed time is not exact until the timer is stopped. The duration field is updated periodically about every 15 seconds. Depending on the units for the field each update might not be apparent.
The Start action field uses the ‘Start or Stop a Timer’ procedure step type to start the timer and tells it to display elapsed time in the Duration field. The elapsed time is periodically updated in the field. Filed data forms can be reopened for editing and a timer restarted by pressing the start button – it will add to the last saved elapsed time in the field.
The Stop action field uses the ‘Start or Stop a Timer’ procedure step type to stop the timer and tells it to display the final elapsed time in the Duration field. The stop button should be used to stop the timer and update the field with the final elapsed time. If the data form is saved without using the stop button the last displayed elapsed time will be saved.
Warning:
The timer will only run while the data form is open for editing. If you file the form while the timer is running it will no longer track elapsed time and the last time in the field will be saved
Configuration
These are the basic steps to configure this procedure step type. Formever will lead you through as you point and click.
Label the procedure step
Add Quantity field to Show Elapsed Time
Add Action fields (button)
Configure the Start Timer procedure
Name a timer
Select a field to hold timer elapsed time
Configure the Stop Timer procedure
Name the timer to match the start timer
Select field to received final elapsed time
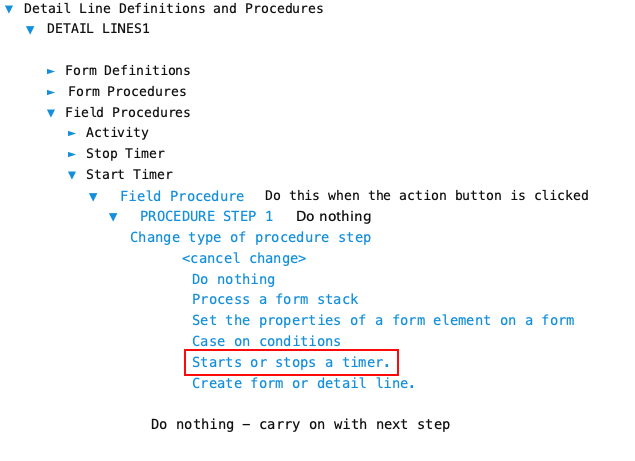
'Starts or stops a Timer' in list of procedure step types for the Action Field Procedure - Note This is In Detail Lines
Step 1 - Label Definition
Give the procedure step a descriptive label. This doesn’t have to be done first. But make sure you provide a descriptive label before filing the master form.
Doing it first serves as a reminder of what you are trying to accomplish as you configure the step. Especially if there will be multiple steps in the field procedure or form procedure.
Step 2 - Add Field for Elapsed Time
The timer procedure needs a field in the detail line in which to periodically assign the elapsed time.
Be careful about specifying which units to use for the field. Hours is likely the best choice. Add one or two digits after the decimal point to show fractional hours. Once a data form is filed you will not be able to change the units.
Allow data entry and people will be able to enter time directly or adjust the elapsed time. Disallow data entry to prevent anyone from changing the elapsed time.
Step 3 - Add Action Fields (Buttons)
Add two action fields to the detail line for starting and stopping the timer.
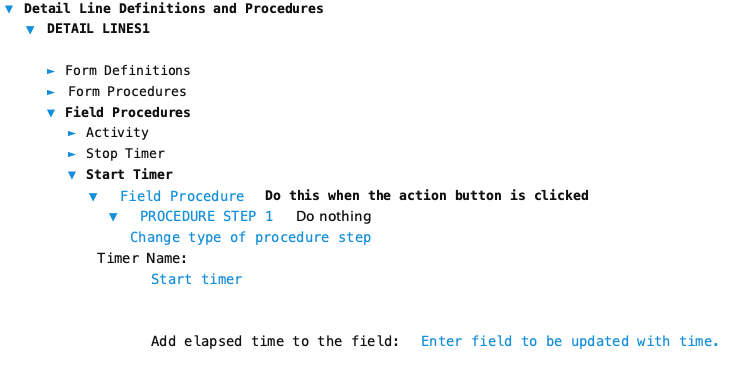
Step 4 - Configure Start Timer
Configure the action field (button) to start the timer:
Name the timer
Select quantity field to receive elapsed time updates
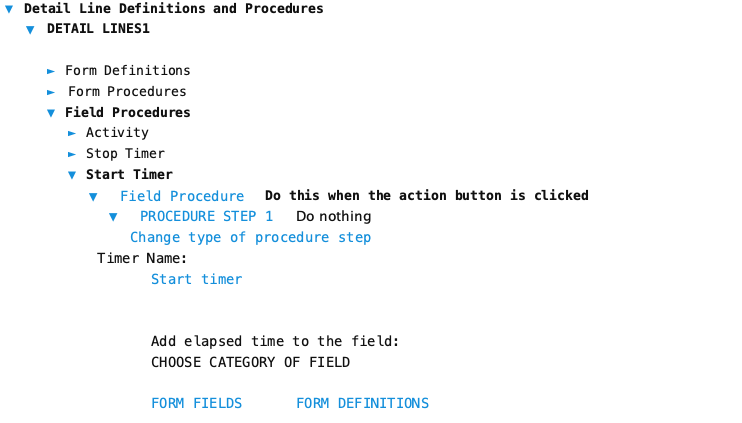
Open the Field Chooser to select the field for the timer to save elapsed time
Opened Field Chooser
Field Chooser Showing Duration Quantity Field On The Detail Line
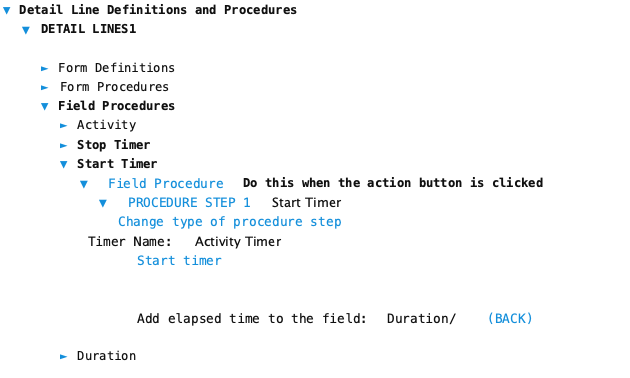
Type a name for the timer. Any name will work. It will also be used with the stop timer procedure.
Completed Start Timer using a Timer Named 'Activity Timer' which must be named in the Stop Timer procedure
Step 5 - Configure Stop Timer
Configure the action field (button) to stop the timer:
Name the timer
Select quantity field to receive final elapsed time update
The name of the timer must match exactly the timer named in the start timer procedure. This is so the timer can be stopped and the final elapsed time determined.
The quantity field selected must be the same field as chosen in the start timer procedure. When the timer stops it will place the final elapsed time in the field.
Setup Stop Timer
Completed Stop Timer using same Timer Named 'Activity Timer' which is started by the Start Timer procedure