In Formever references between master forms are a foundational aspect of Formever.
Use the Form Reference field to specify a relationship with another master form. For example, the Sales Order form will have a form reference to the Customer form.
Form references can be made to entity master forms or transaction master forms.
During data entry click on the field to open the selection list for the field. The selection list shows available data forms of the type specified by the form reference field. Choose a data form and the reference is complete.
Example
The following is an example of filling in a form reference to Delivery Address on a simple Client form.
Setup
To setup a form reference field the basic steps are:
Choose the master form to reference
Design the data form selection list
Choose the form reference description
For more information about form references and context see << TBD >>
Drag a Form Reference field template from the column of field templates on the right of the form layout area. Drop the template on the layout area. Then click the new field to open the field designer.
Drag Quantity Field Template to Form Layout Area
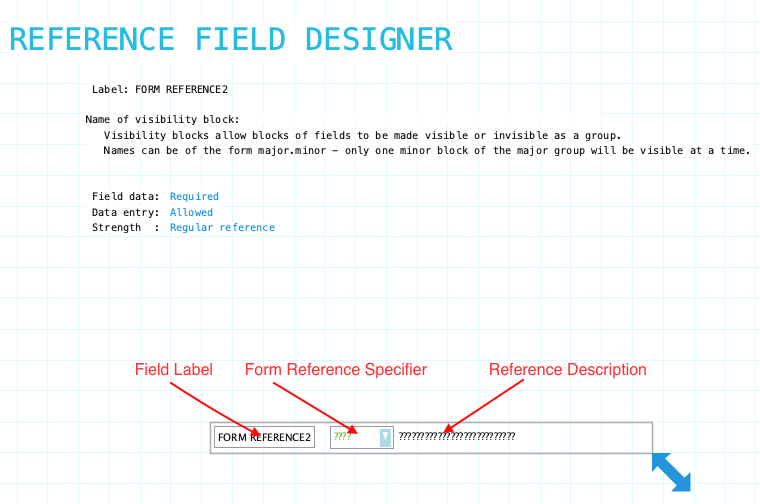
Form Reference Field Designer
Open the Form Reference field designer by clicking on a form reference field in the layout area. Close the designer by clicking on the background of the open field designer.
Note: During data entry the reference description is not an input component. It is a display only component that shows a description of the selected data form reference.
Label: Name of the form reference field. Provide a meaningful name even if the label is not displayed on the form. Form references are definitely referred to by definitions and reports. To hide the field label drag it outside the bounds of the field. To edit the label using the field label designer click on the label.
Name of visibility block: If the field needs to be visible or hidden or along with other fields on the form provide a name of a visibility block. See Visibility Blocks for details.
Field Data: Indicate if the field must have data entered before the data form can be filed. Choices: Required/Optional
Data Entry: Indicate if data entry is allowed. Sometimes a field needs to be display only. This can be changed using form or field procedures. Choices: Allowed/Not Allowed
Strength: This is an advanced feature. In most cases you can just leave this to the default as "Regular Reference". An informational reference is when the reference is not in the direct logic flow but is a reference for some ancillary reason. This is best explained by an example. You could have an Expense Form for an employee. The expense form will have a reference to the employee claiming the expenses. That is really the main thrust of the business logic. The system will probably get lists of expense forms for an employee and do other processes that live in the context of that employee. However you might have a reference to another employee who approved the form. This might be someone in another department who is not normally related organizationally to the employee whose expense form it is. If you have a button on an employee form that brings up all expense forms you don’t want the context of this ‘approving employee’ to restrict the context. If this was a normal reference then the context of the employee you are getting the list for and the context of the ‘approving employee’ would conflict and you would end up with no forms. So in this case you make the reference to the ‘approving employee’ informational. That stops it from conflicting with normal processing as the reference to the ‘approving employee’ is just ancillary to the main process of filing, accounting and paying expense forms.
Form Reference field has a standard field label. Click here to view field label designer details.
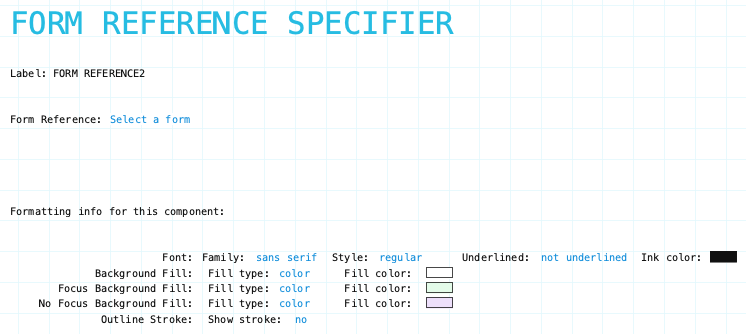
Form Reference Specifier Component
Use the form reference specifier component to specify the master form to be associated with the form you are designing. The associated master form may be an entity or transaction form.
During data entry this field will used by a director to associate a specific data form to the data entry form being edited. After selecting a data form either the form code or transaction date will be displayed along with a description from the selected data form.
These are the basic steps to configuring the form reference specifier:
Click on the form reference specifier component to open the Form Reference Specifier designer. Click on the background of the open designer to close.
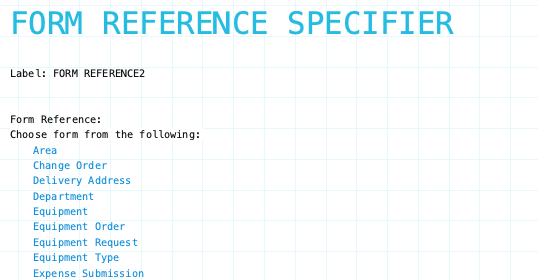
The first step is to select the form to create an association reference. Click on ‘Select a form‘. This opens a list of all master forms in the system. Click on the desired master form.
Form Reference Specifier showing master forms.
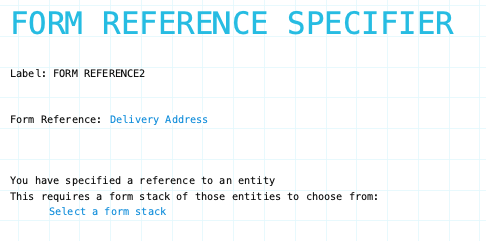
Form Reference Specifier showing selected master form reference
Pick Form Stack
Once you’ve picked the master form you need to specify which data forms will be presented at data entry time. This is done by picking a form stack.
For example, suppose you are designing a master form called Bill Payment for paying outstanding vendor bills. One of the form references will be to Vendor master form. At data entry time the director needs to pick a vendor to pay from a list of vendor with unpaid bills. What is needed is a Vendor form stack that only has vendors with unpaid bills. That is the form stack that needs to be picked for the form reference field.
The form stack you need may already exist. But, if it doesn’t you will need to define the form stack before it can be picked. Defining forms stacks is done of the back side of master forms or the Organization form.
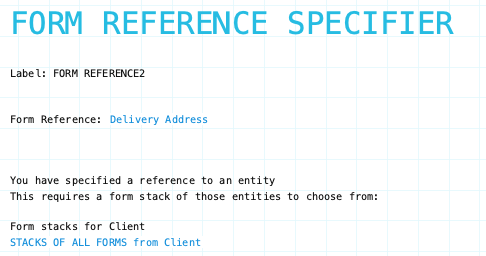
Form Reference Specifier showing form stack chooser
Form Reference Specifier showing available form stacks
In the images above the Delivery Address master form is selected as the form reference. The available form stacks on Delivery Address are presented at the bottom of the form. In this case there is only one form stack. Form stacks starting with ‘*’ indicate it is a stack of all data forms. So above ‘*Delivery Address’ is a stack of all delivery address data forms
Design Data Form Selection List
After picking the master form and picking the form stack the next step is to design the selection list. This selection list will present the data forms of the form stack so the director can choose one.
To design the selection list you need to specify what information is shown in the rows in the selection list. This information comes from the data forms in the form stack. Continuing with the Bill Payment example useful information to list would be the vendor name, vendor code and total owed.
To build the selection list you create a content description text block. This is done by placing fields from the form stack into the text block.
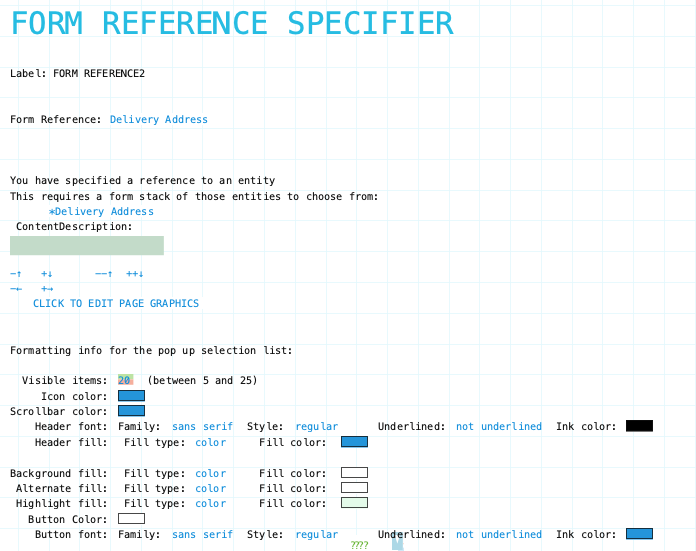
Building the selection list for *Delivery Address form stack - Content Description Empty
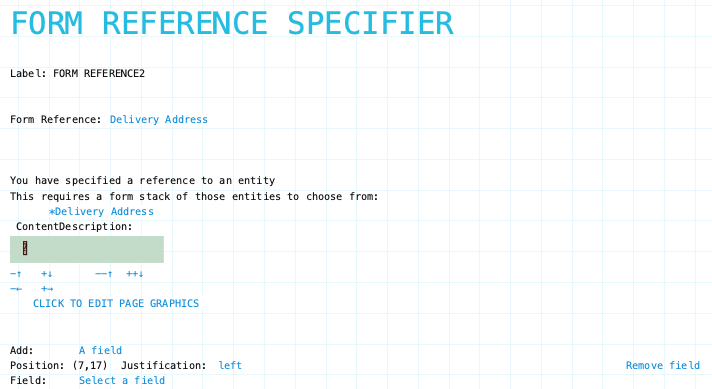
Building the selection list - Content Description with start of a field
Content Description text blocks don’t just have to hold form fields. You can place text in the text block also. Click ‘A field‘ to switch to ‘Text‘.
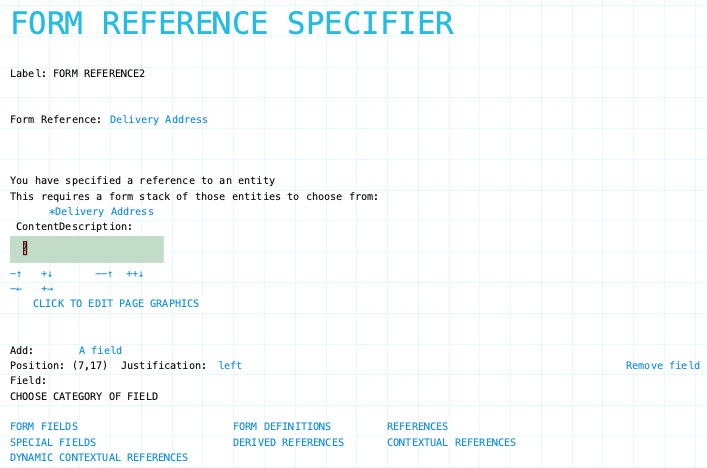
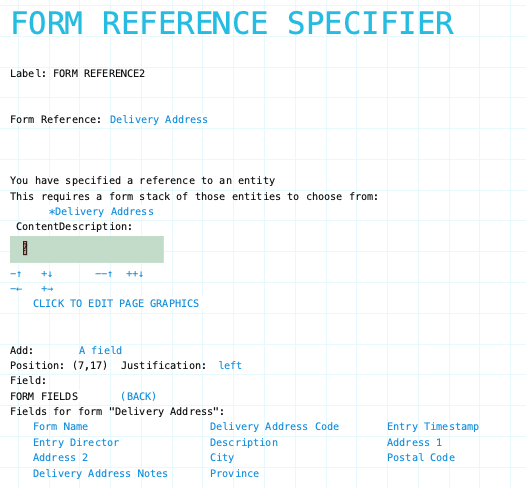
The image below shows the categories of fields available for placement. Selecting the ‘FORM FIELDS‘ category the image below that shows fields from the front of the Delivery Address form.
Building the selection list - Showing categories of fields for placement in Content Description
Building the selection list - Showing Available Fields to place in Content Description
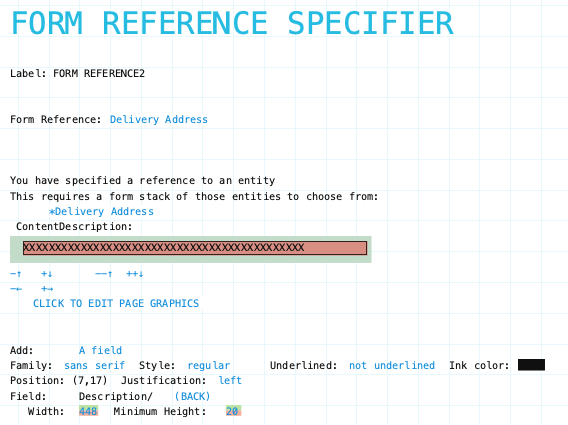
Building the selection list - Showing Delivery Address Description field placed in Content Description
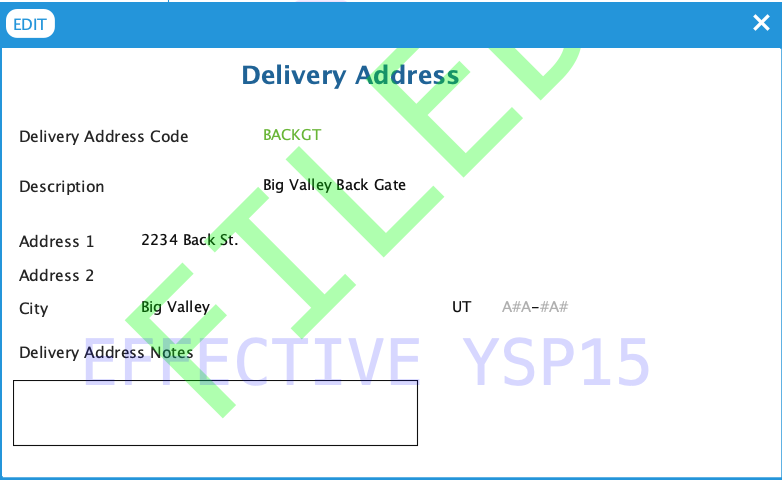
Shown below is a sample Delivery Address data form being referenced.
Delivery Address form referenced by the client form
Reference Description Component
The reference description component displays text that describes the selected data form reference. It is not an input field.
Form references show the form code or transaction date in the form reference specifier component. This usually isn’t very informative, so some descriptive text is needed to help identify and confirm the selected data form. This is the main purpose of the reference description component
As part of designing a form reference field you need to tell Formever what text to display from the referenced form. This is done by picking a field from the referenced master form. This could be a field on the front of the form. It could also be form definition for a text block containing multiple fields and text. It is up to you, the designer, to determine what should be shown.
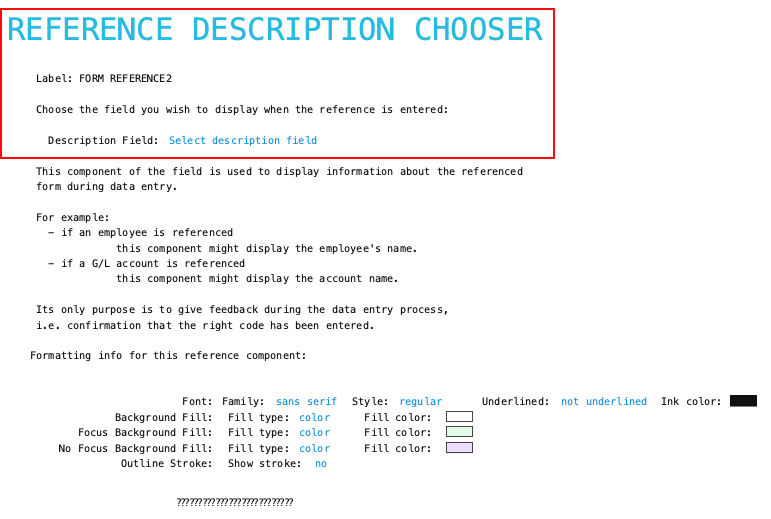
Start by clicking on the reference description component to open the reference description chooser. To close click on the chooser background.
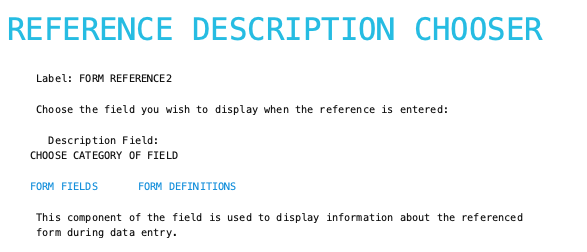
Reference Description Chooser
Click on ‘Select description field‘ to view the available categories of fields. Then click on a catgory to view available fields.
Reference Description Chooser showing categories of available fields
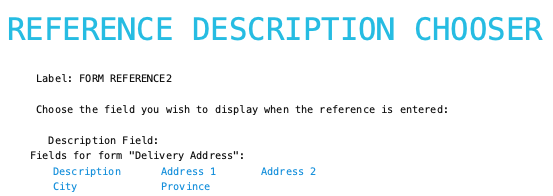
Reference Description Chooser showing available Form Fields
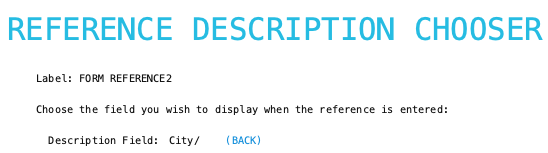
Reference Description Chooser showing selected form field 'City'
Finally, pick the field to show. In the above image the Delivery Address City field was chosen.
Form Reference Attributes
The form reference attributes only apply to the form reference component.
Reference Specifier Component Attributes
Family/Style/Underline Ink Color: Font attributes of the form reference component text.
Background Fill: The fill for the form reference component when the form is opened for viewing but not editing. Fill can be a color, transparent or various types of gradients.
Focus Background Fill: The fill for the form reference component when it has focus. Focus means it will accept input. Basically the cursor is in the field. This could only occur when the data form is editable.
No Focus Background Fill: The fill for the form reference component when it does not have focus. This is the normal background fill when the data form is editable. It is editable when either the data form is first created or when it is reopened for editing.
Outline stroke: Outline of the form reference component of the field. If Yes then the color and width of stroke can be set. Adjust outline stroke width by clicking the green portion of the digit to increase and the red portion to decrease the line width.
Reference Description Attributes
The reference description attributes only apply to the reference description component.
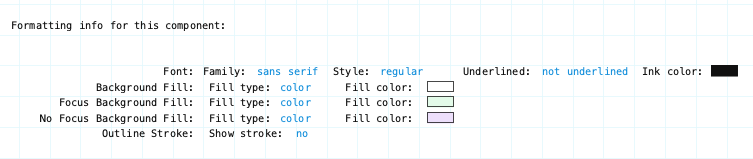
Reference Description Component Attributes
Family/Style/Underline Ink Color: Font attributes of the description component text.
Background Fill: The fill for the description component when the form is opened for viewing but not editing. Fill can be a color, transparent or various types of gradients.
Focus Background Fill: The fill for the description component when it has focus. Focus means it will accept input. Basically the cursor is in the field. This could only occur when the data form is editable.
No Focus Background Fill: The fill for the description component when it does not have focus. This is the normal background fill when the data form is editable. It is editable when either the data form is first created or when it is reopened for editing.
Outline stroke: Outline of the description component of the field. If Yes then the color and width of stroke can be set. Adjust outline stroke width by clicking the green portion of the digit to increase and the red portion to decrease the line width.