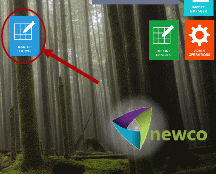
So the first thing Tony needs is a Client Form. To make a new form, find the “Master Forms” widget and double click to open it:
Make sure Master Form creation is unlocked:
The Master Form list can be locked to prevent accidential modification of Master Forms.
Tony’s company

Then click on the “Get Blank Master Form” button to get a fresh form template to work with:
Reporting
This will open up the designer to the first stage, where you pick what kind of form you are creating, an entity-type, or a transaction-type.
Entity type forms are for things that will persist through time, like a client, or a project, or an asset, etc.
Transaction-type forms are for things that are instantaneous in nature. They are a transaction that takes place in a specific accounting period, and usually have posting implications for the general ledger, such as an invoice, or a payment, or a journal entry, etc.
Click on the blue text to toggle through the choices:
A client form is an entity type form, so we’ll stop on “entity”. Now we need to give our form a name. Click on the space beside “Form Name:” and enter “Clients”:
A client form is an entity type form, so we’ll stop on “entity”. Now we need to give our form a name. Click on the space beside “Form Name:” and enter “Clients”:
Once you’ve named it, click on the blue text, “Click here to continue set up of master form”:
This will open up the Form Design Window. We’re now ready to start customizing the form, which is where we’ll pick up next.
